
How to Clean Your Dog’s Ears and the Tools You’ll Need
Tags: date_Octomber_2016 (5)Dog Ear Infection (15)Dog Ears (22)Dogs (216)related (8)How Often Should You Clean Your Dog’s Ears?
The first concern is knowing when to clean your dog’s ears. You don’t want to do it too frequently and disrupt the natural bacterial balance and wax build-up; this can expose the inner ear to more dirt and lead to higher risk of infection. But waiting too long is also a bad idea, since the accumulation of wax and dirt poses a higher risk of ear infection for the dog. So, how do you know when it is time to clean your dog’s ears? Here are some signs to look out for:Murky dark brown wax. Dog ear wax should be light brown. Once it's mixed up with dirt, it becomes dark brown and somewhat murky, like mud. If you notice any such substance, it is a sure sign you need to do an ear clean.
Twigs and other plants. By examining the dog’s ear closely, you can see the inner canal. It is common for dirt, small twigs and leaves to find their way into the ear. This is another sign that your dog is up for an ear cleaning.
Stinking odor. Dirt, wax and yeast can cause odor in your dog’s ears. If you notice a stronger smell, check for an infection before cleaning - it might otherwise be painful for the dog.
Discharge. In most cases, discharge is a sign of infection. In some cases, however, if your dog’s ears are not cleaned on time, they could get blocked and this could also cause small amounts of discharge.
If you notice discharge, yeast-like odor or your dog shows signs of pain or discomfort, take a closer look and check for an ear infection before cleaning. In case of an ear infection, EcoEars will come in handy. It is a great product for treating and preventing dog ear infections.
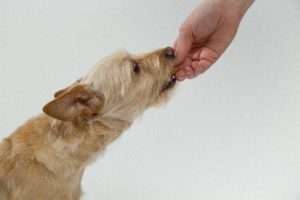
"I've got this ear cleaning thing down! I might just need a little bit of your help..."
What Tools Do You Need to Clean Your Dog’s Ears?
Before you start the cleaning process, you should get organized first. Start by gathering the tools you’ll need.Ear cleaning solution. The first and most important product that you'll need is cleaning solution. There are many options out there, but not all of them give the same results. Consider factors like safety, ingredients, effectiveness, and ease-of-use. With a 94% success and approval rate from hundreds of testimonials, EcoEars is an excellent organic choice.
Cotton balls and cotton pads. Use cotton pads for the outer ear, while cotton balls are safer and easier to use for the inner ear.
A clean towel. After the whole cleaning process, you will need to dry the dog's ears.
Treats for your dog. You need this to be a pleasant experience for your dog. Nothing makes it better than having treats around.
Once you have all the equipment set up, you can call your dog. Be sure to do this in a calm and warm manner. Start by giving your dog a nice belly rub to help him calm his nerves and get in a comfortable position. Once this is done, you can safely begin the cleaning process.
Being sweet and gentle will ensure that your dog lets you clean their ears in the future!
Step by Step Guide on Cleaning Dog Ears
Step 1. Since ear cleaning can get a little messy, you will need to make sure you set up in a place that will be easy to clean afterwards or outdoors. At the same time, you will want to grab an apron or some home clothes.Step 2. Start by giving the dog a treat before you begin the ear cleaning and ask her to sit down. This should make the process much easier for both of you.
Step 3. Have the dog lie down or sit on his side. Go over his neck and clutch his leg tightly at the elbow. Also, place your other hand near her head, so he doesn’t raise it during the process.
Step 4. Reach for your bottle of EcoEars dog ear cleaner and put a liberal amount of the cleaner in both ears. To help it work itself down the ears, rub the base of the ears for about 30 seconds. Also, try to mix the ear cleaner around the ear canal as well. If you do this right, you should get some big squelchy noises. Check out this instructional video for some extra help.
Step 5. After massaging the ears, you might want to take a step back and let the dog shake his head vigorously. You might notice chunks of ear wax flying out. This is perfectly fine.
Step 6. Soak a cotton ball or pad with the ear cleaning solution and squeeze out the excess into the dog’s ears. Use the cotton ball to keep the ear closed so that it soaks up the excess liquid, clean up the wax and any other debris.
Step 7. Follow this up by wiping the visible surface of the ear. You should never go beyond what you’re able to see. The inner canal of the dog’s ear is very delicate and you can cause a lot of damage if you are not careful.
Step 8. Let the dog shake his head once more to get out any remaining pieces of debris. Use the towel to dry out any excess ear cleaner and just like that you’re done.
Last but not least! Reward your dog for being patient with yet another treat so next time they know they have a reason to withstand all that discomfort.